How to Add an AI Chatbot to Your FlutterFlow App in 5 Minutes
FlutterFlow makes building apps easy. But when your users need help inside the app, you're stuck. FlutterFlow has no built-in chatbot widget. No drag-and-drop AI assistant. Nothing.
Your options until now: build a custom chatbot from scratch (defeats the purpose of using FlutterFlow) or use an external tool that doesn't integrate with Flutter at all.
Widget Chat changes that. It's a Flutter package that drops a fully functional AI chatbot into any Flutter app—including FlutterFlow projects. Train it on your content, customize the look, and your users get instant answers 24/7.
This guide walks you through the entire setup. No Flutter coding experience needed.
Why FlutterFlow apps need a chatbot
FlutterFlow has 400,000+ users building apps without code. But "no code" doesn't mean "no support needs."
Your users will:
- Ask the same questions repeatedly
- Get stuck on features you thought were obvious
- Need help at 3 AM when you're sleeping
- Leave 1-star reviews instead of asking for help
The math: If your app gets 100 daily active users and 5% need help, that's 5 support requests per day. At 10 minutes each, you're spending 250 hours per year answering questions. A chatbot handles 80% of those instantly.
What you'll need
Before starting:
| Requirement | Details |
|---|---|
| FlutterFlow account | Paid plan required (Standard or higher) for custom pub dependencies |
| Widget Chat account | Free to start at widget-chat.com |
| Your project secret key | Found in Widget Chat dashboard after creating a project |
| 5 minutes | That's it |
Important: FlutterFlow moved custom pub.dev dependencies to paid plans only. Free plans cannot add external packages. If you're on a free plan, you'll need to upgrade first.
Step 1: Create your chatbot on Widget Chat
First, set up your AI chatbot:
- Go to widget-chat.com and create an account
- Click "New Project"
- Name your chatbot (e.g., "My App Support Bot")
- Add your training data—this is what your chatbot knows:
- Paste your FAQ content
- Add your app documentation URLs
- Upload any support documents
- Copy your Project Secret Key from the dashboard
Your chatbot is now trained and ready. Everything from here happens inside FlutterFlow.
Step 2: Add the Widget Chat dependency in FlutterFlow
This is where most people get stuck. FlutterFlow recently moved dependency management:
- Open your FlutterFlow project
- Go to Settings & Integrations (gear icon, left sidebar)
- Scroll to Project Dependencies
- Click Custom Pub Dependencies
- Add a new dependency:
- Package name:
widget_chat - Version: leave empty for latest
- Package name:
Heads up: If you don't see "Custom Pub Dependencies," you're on a free FlutterFlow plan. This feature requires a paid plan (Standard or above).
Step 3: Create the custom widget
Now create the widget that wraps the chatbot:
- In FlutterFlow, go to Custom Code (left sidebar,
</>icon) - Click "+ Add" → "Custom Widget"
- Name it
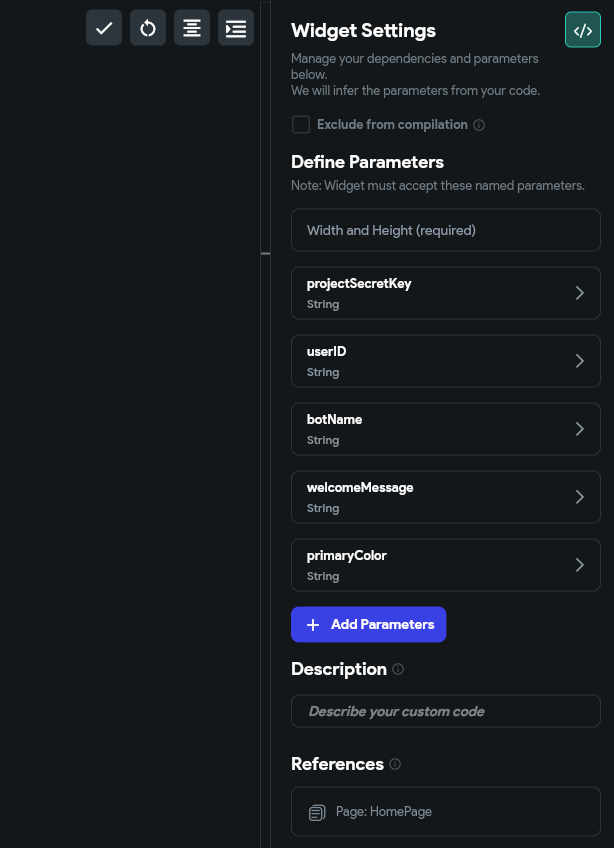
WidgetChatBot - Add these parameters:
| Parameter | Type | Required | Description |
|---|---|---|---|
projectSecretKey |
String | Yes | Your Widget Chat project key |
userID |
String | Yes | Unique ID for each user (use Firebase Auth UID) |
botName |
String | No | Display name (default: "Assistant") |
welcomeMessage |
String | No | First message shown (default: "How can I help you?") |
primaryColor |
String | No | Hex color code (default: "#6366f1") |
- Replace the widget code with:
// Automatic FlutterFlow imports
import '/flutter_flow/flutter_flow_theme.dart';
import '/flutter_flow/flutter_flow_util.dart';
import '/custom_code/widgets/index.dart';
import '/flutter_flow/custom_functions.dart';
import 'package:flutter/material.dart';

import 'package:widget_chat/chat_widget.dart';

class WidgetChatBot extends StatefulWidget {
  const WidgetChatBot({
    super.key,
    this.width,
    this.height,
    required this.projectSecretKey,
    required this.userID,
    this.botName,
    this.welcomeMessage,
    this.primaryColor,
  });

  final double? width;
  final double? height;
  final String projectSecretKey;
  final String userID;
  final String? botName;
  final String? welcomeMessage;
  final String? primaryColor;

  @override
  State<WidgetChatBot> createState() => _WidgetChatBotState();
}

class _WidgetChatBotState extends State<WidgetChatBot> {
  @override
  Widget build(BuildContext context) {
    return SizedBox(
      width: widget.width ?? MediaQuery.of(context).size.width,
      height: widget.height ?? MediaQuery.of(context).size.height,
      child: ChatWidget(
        configuration: BotConfiguration(
          projectSecretKey: widget.projectSecretKey,
          userID: widget.userID,
          name: widget.botName ?? 'Assistant',
          welcomeMessage: widget.welcomeMessage ?? 'How can I help you?',
          color: widget.primaryColor ?? '#6366f1',
        ),
      ),
    );
  }
}
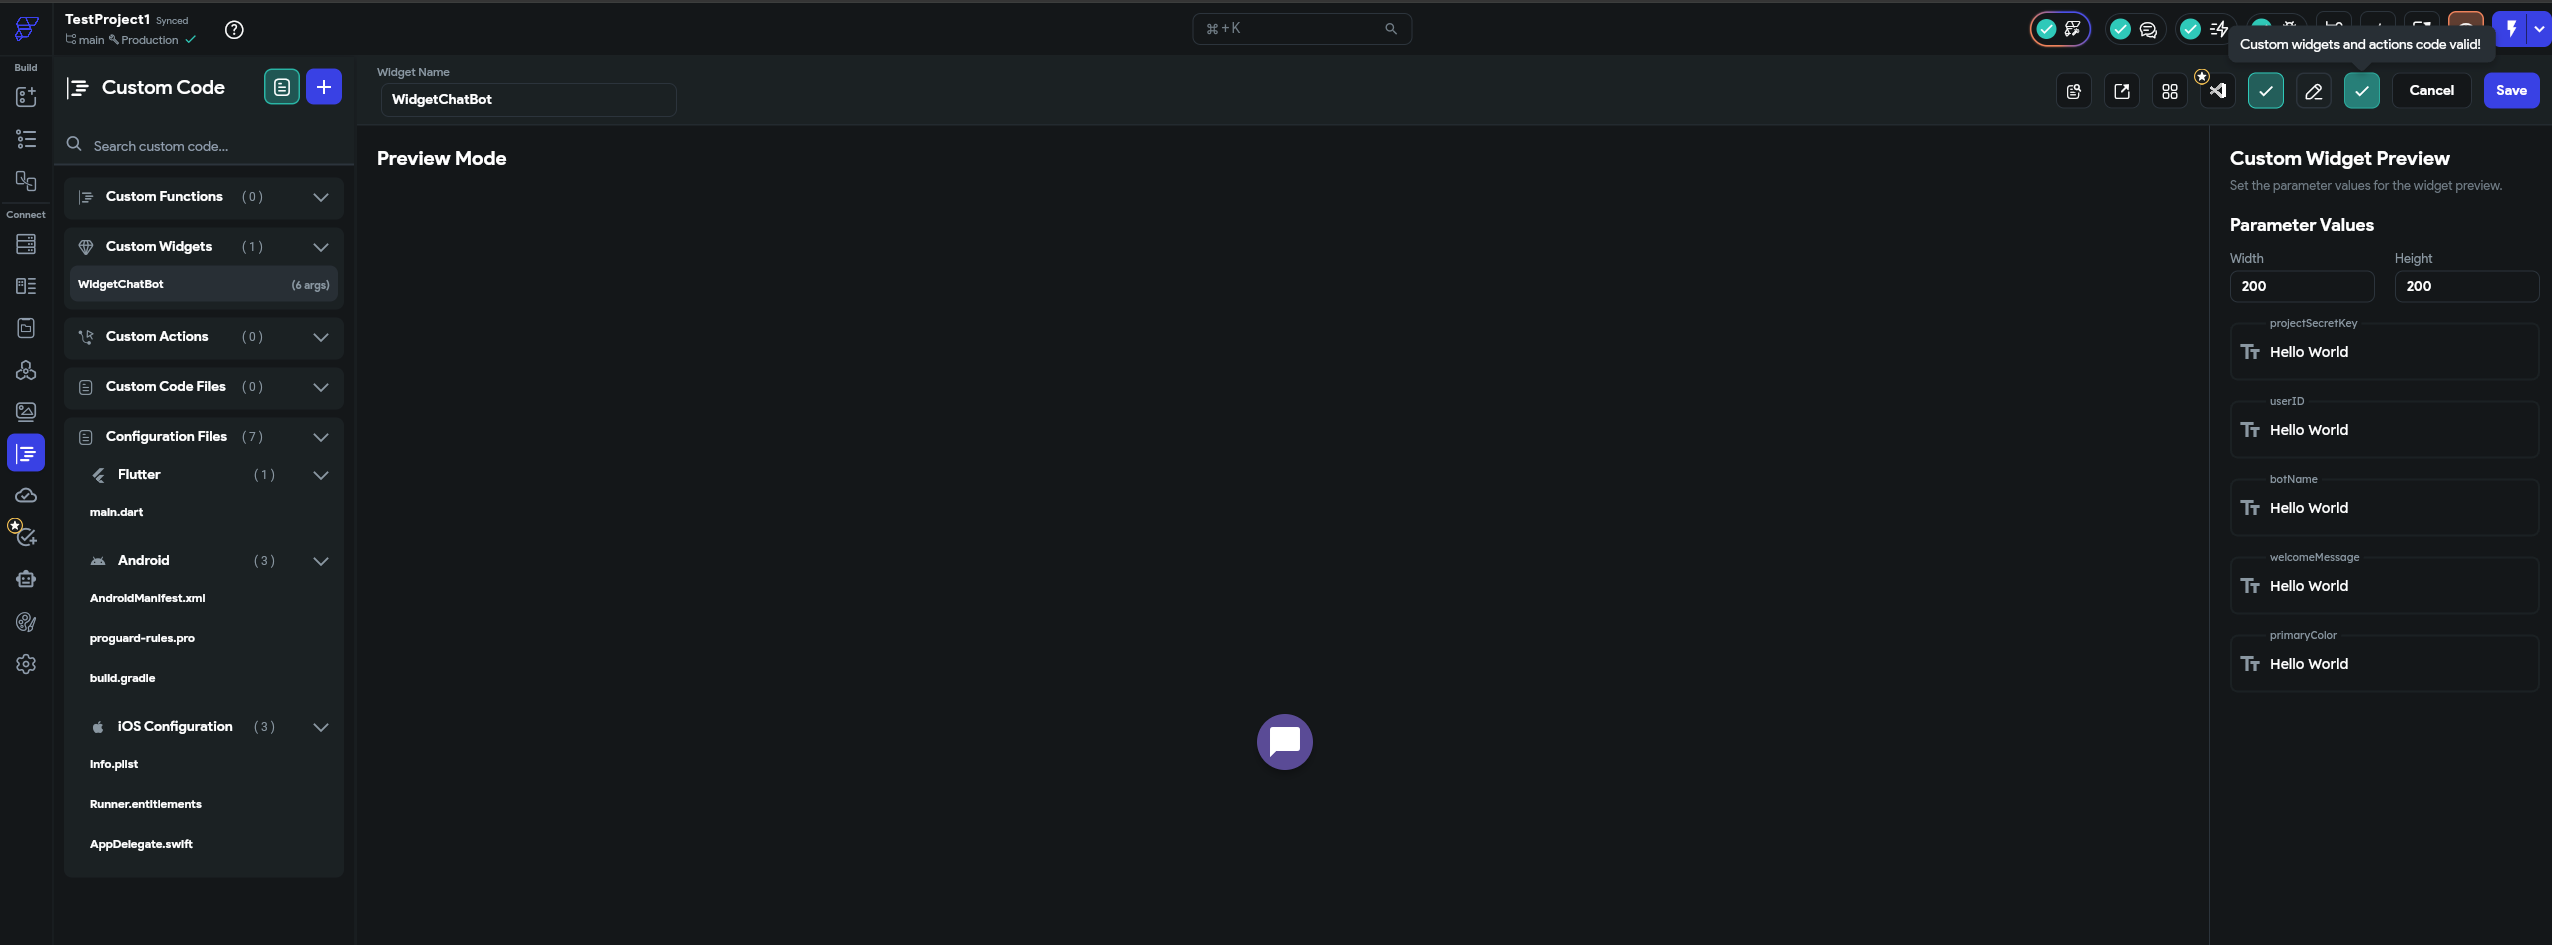
Here's the custom widget editor with the code and the left panel showing the WidgetChatBot widget:

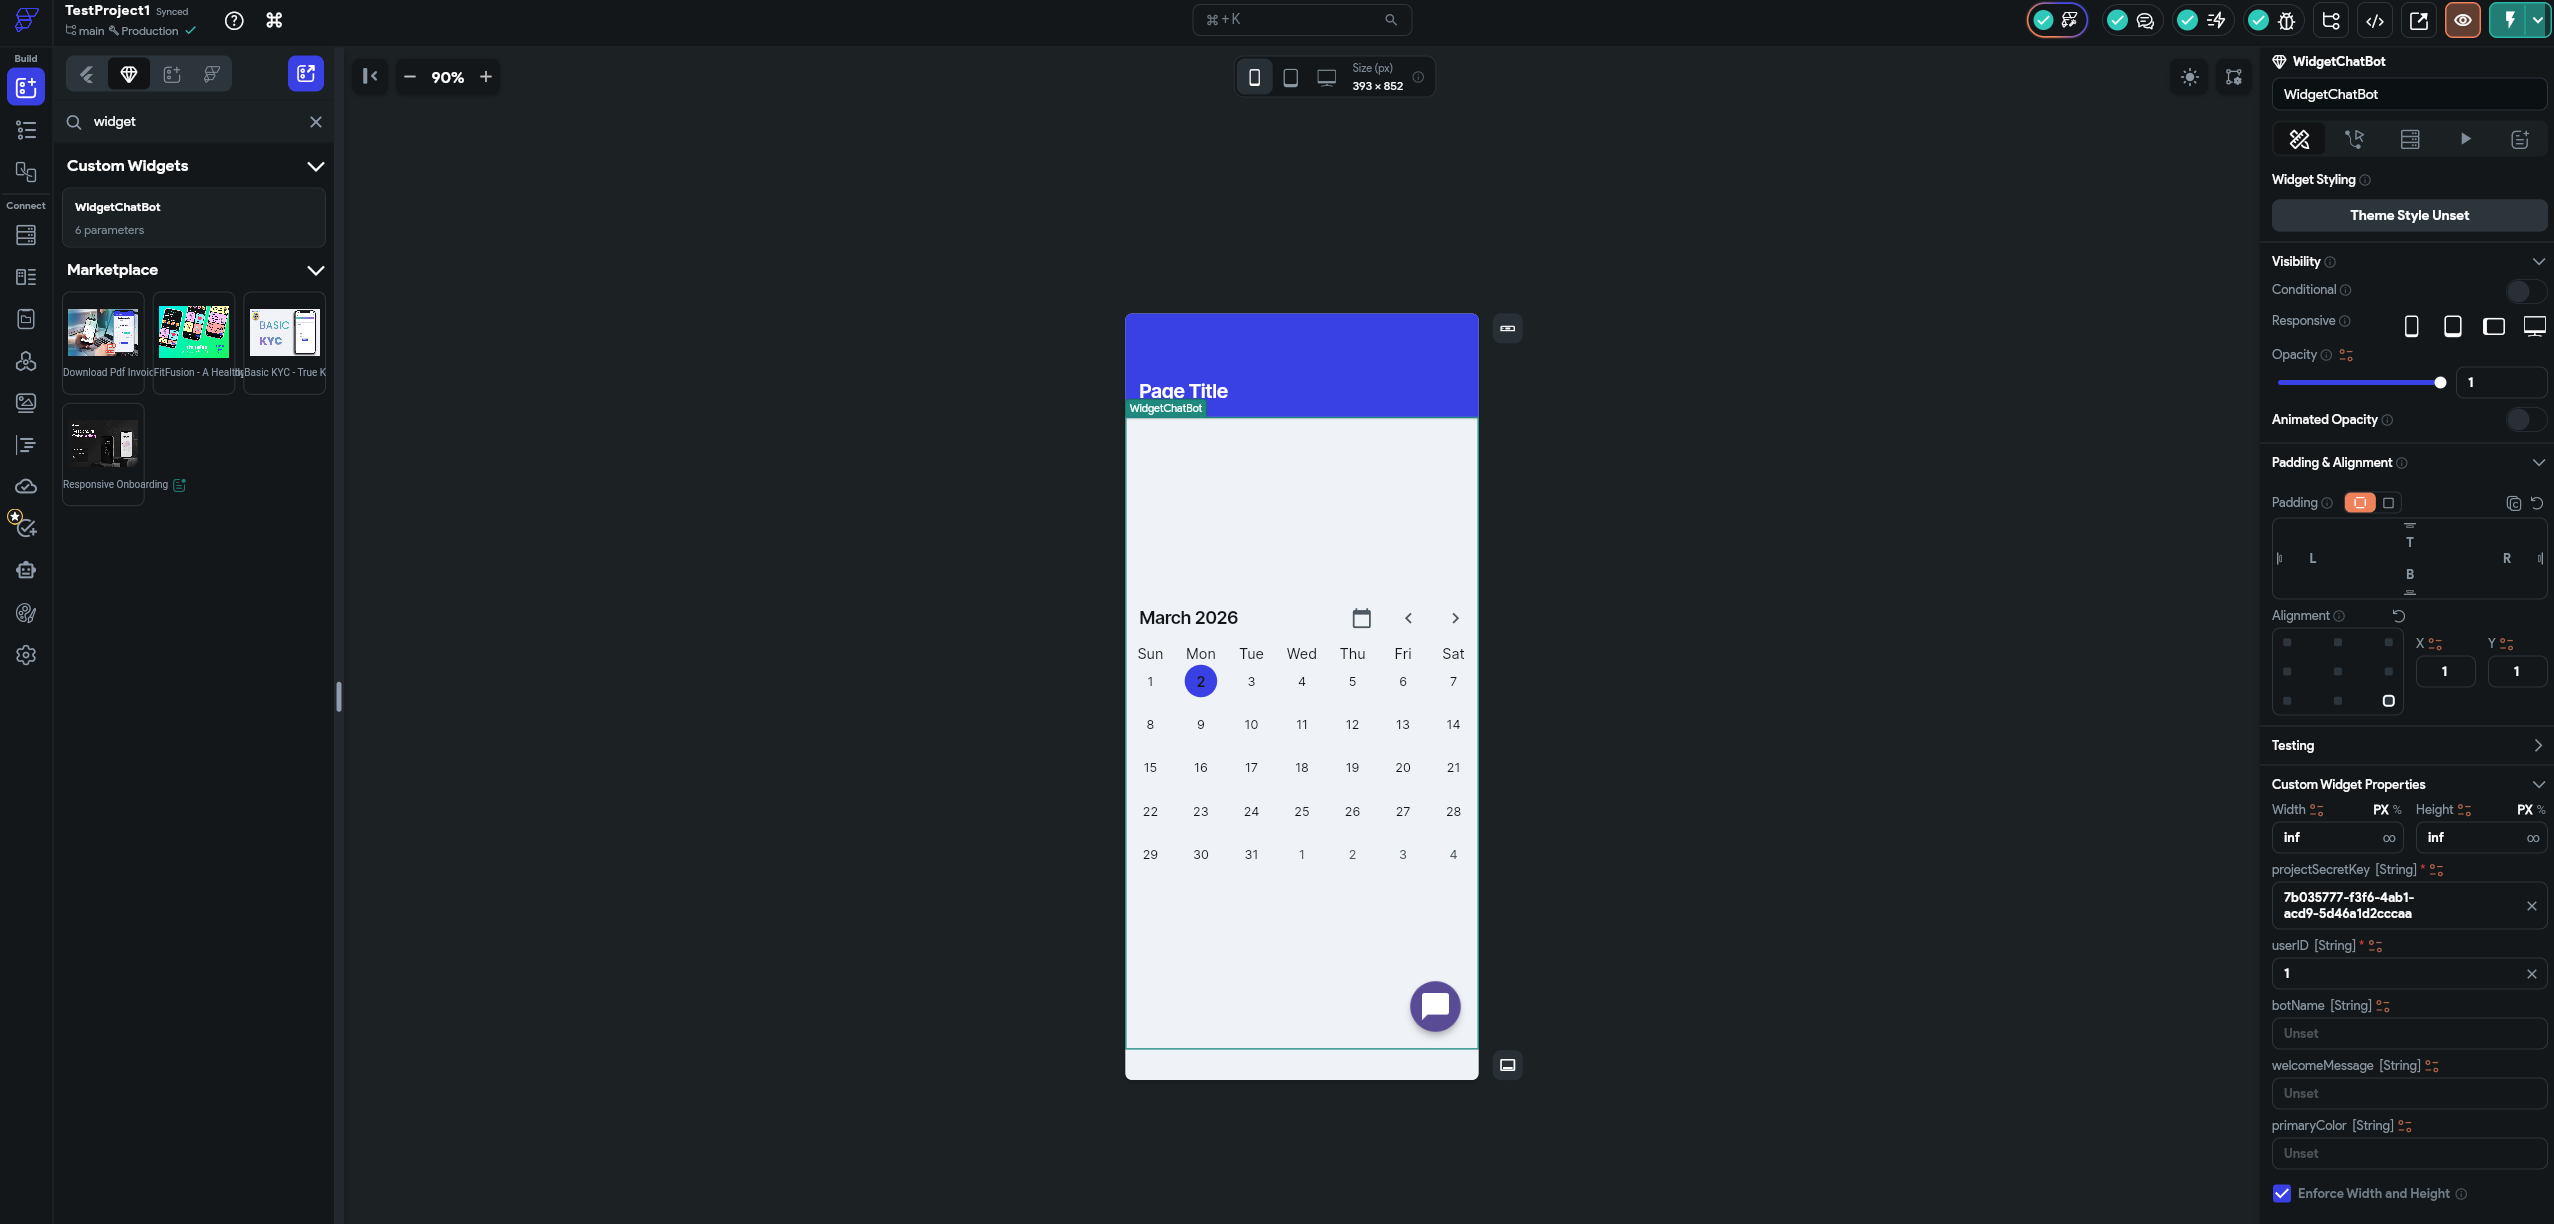
Step 4: Configure widget parameters
In the right panel, you'll see all the parameters you defined. Set your projectSecretKey, userID, and optional customization fields:
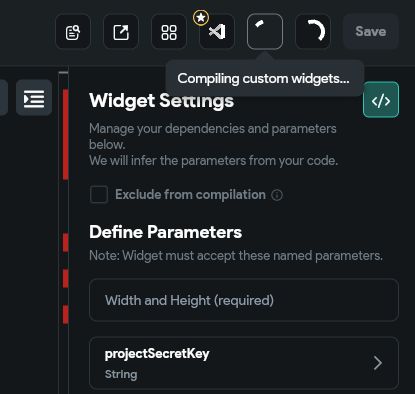
Step 5: Compile the project
Click the Compile button to build your project with the Widget Chat dependency included:
Once compilation finishes, click Preview to see your app. The Widget Chat bot appears at the bottom right of the preview page:
Step 6: Add the widget to your page
Go to the page builder and search for "WidgetChatBot" in the widget search. You'll see your custom widget available and already visible on the preview:
Step 7: Test it live
Click the Test button to run the full app. The chatbot renders as a full-screen chat interface, ready to answer your users' questions:
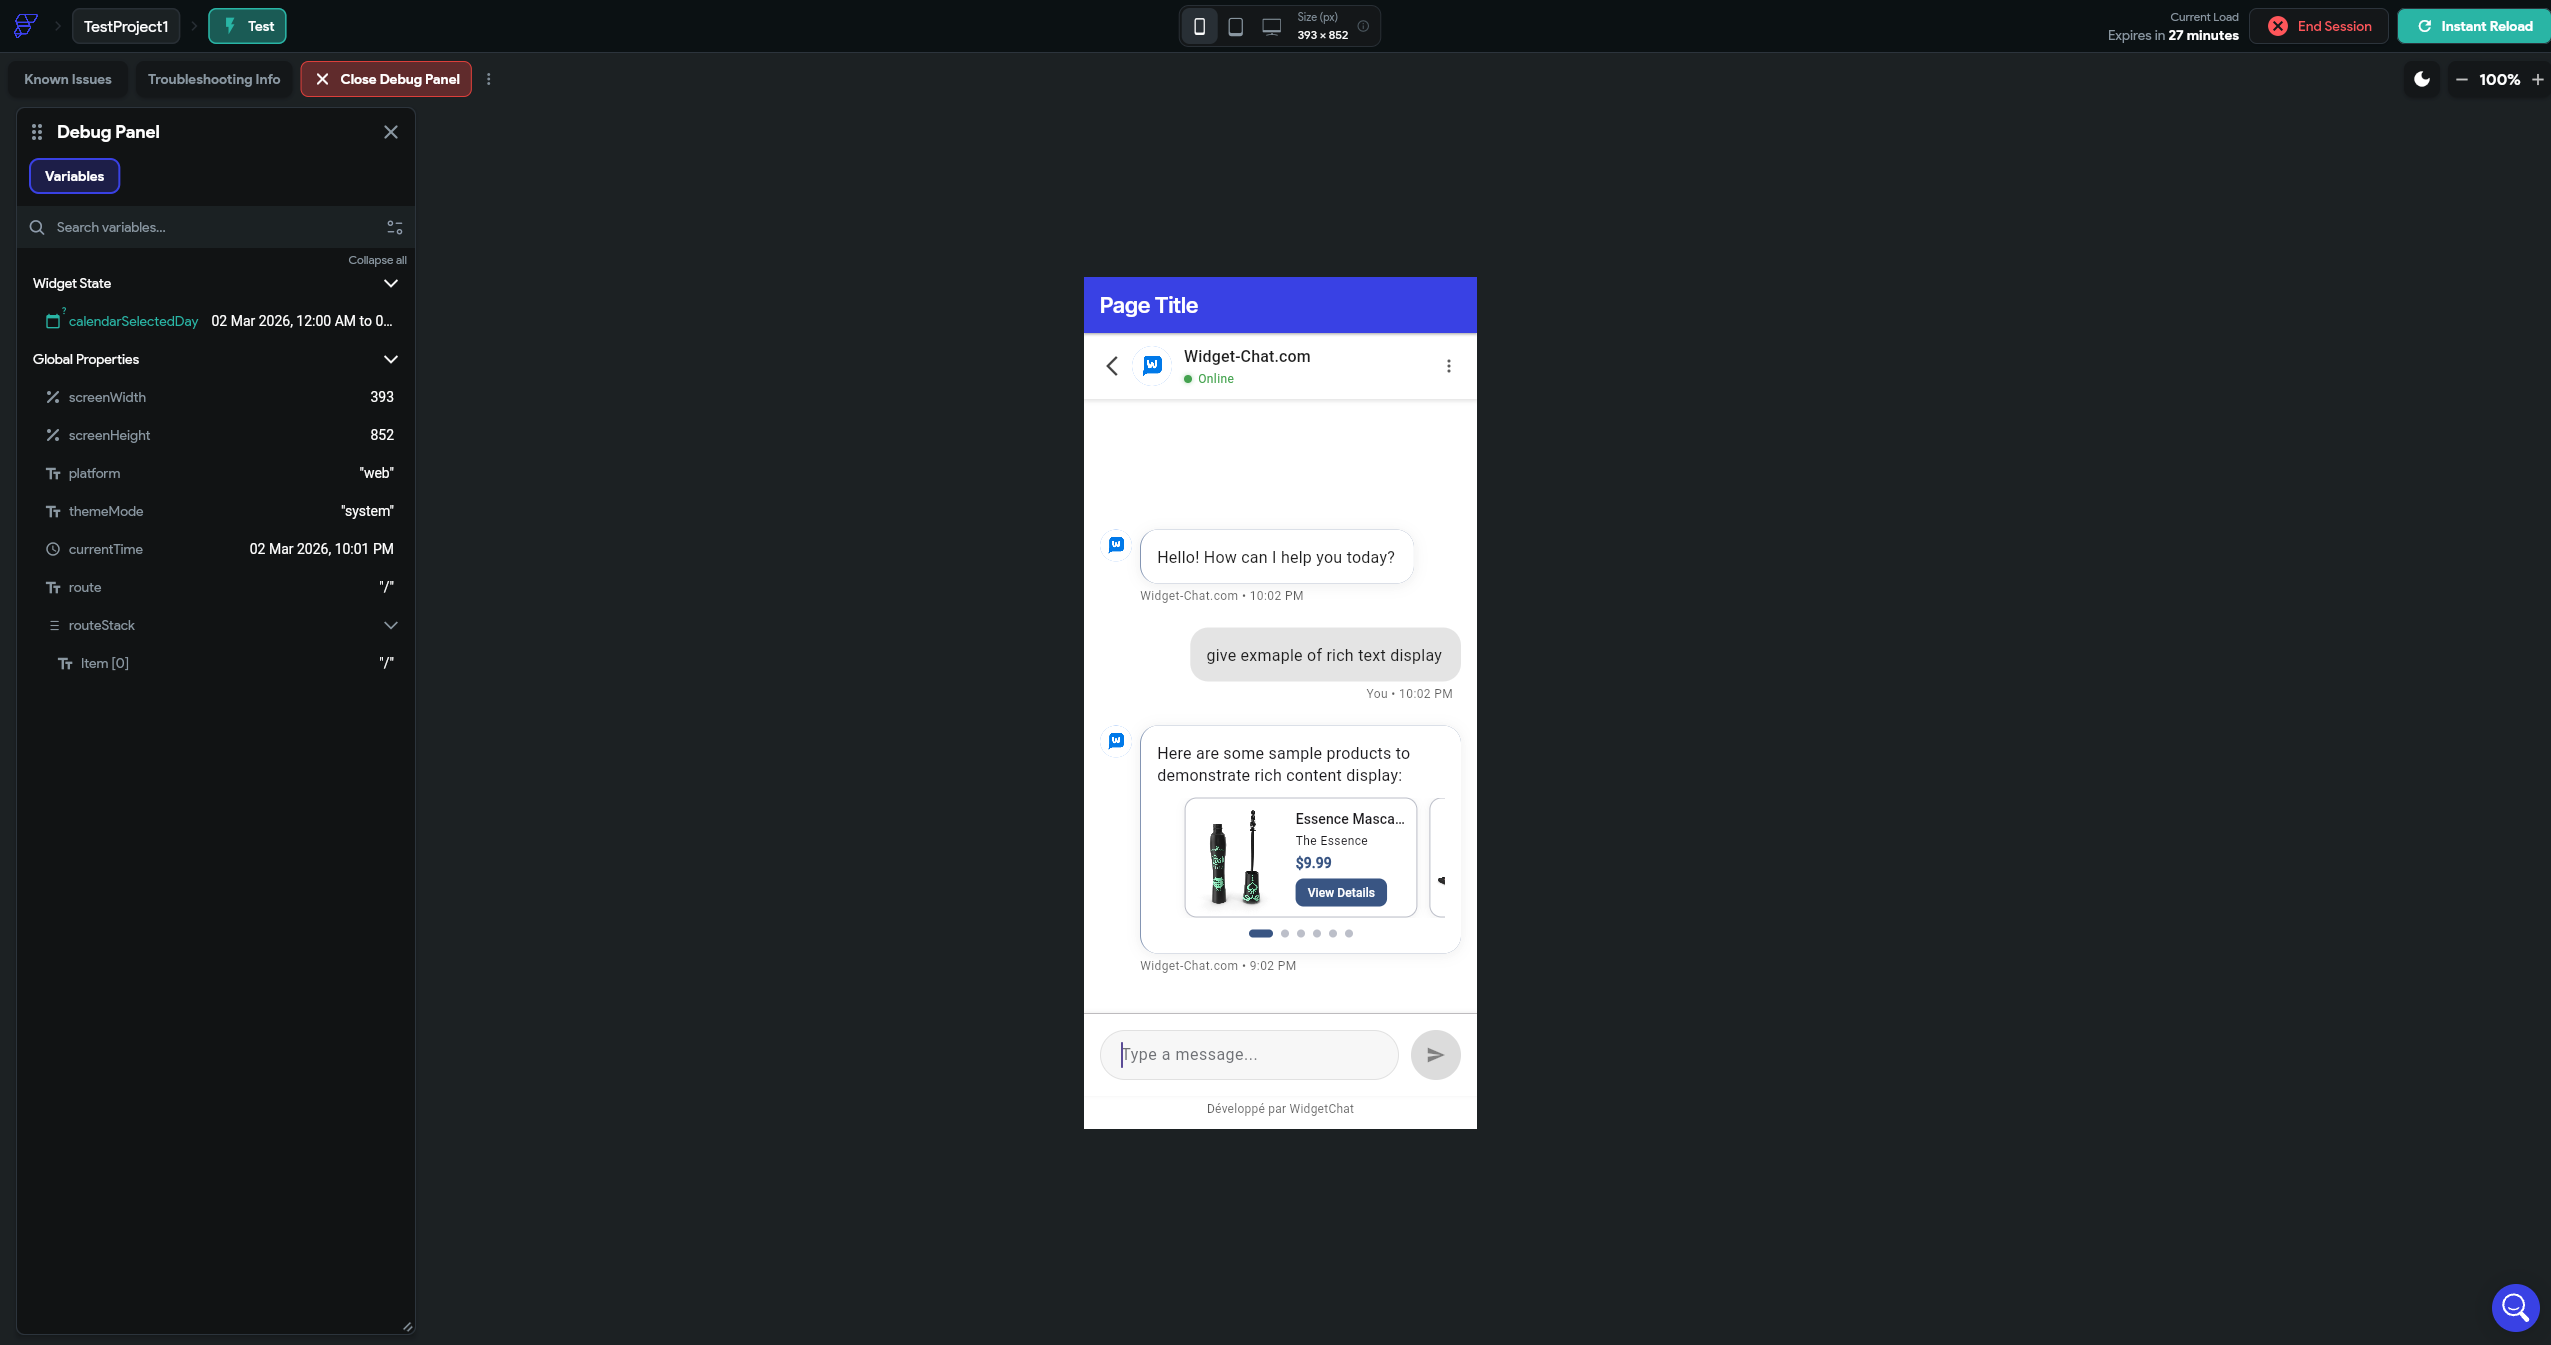
If it works: congratulations, your FlutterFlow app now has an AI chatbot.
If it doesn't compile, check the troubleshooting section below.
Troubleshooting
"Version conflict" error on compile
Common error: path_provider version conflict between FlutterFlow and the package.
What it looks like:
Because every version of widget_chat depends on path_provider ^2.1.5
and flutterflow_project depends on path_provider 2.1.4, widget_chat is forbidden.
Fix: This is a known issue. The Widget Chat team is releasing a version with loosened dependencies. In the meantime, try specifying an earlier version of widget_chat in your Custom Pub Dependencies.
Widget shows "Placeholder" text
This is normal. Custom widgets with pub.dev dependencies don't render in the FlutterFlow canvas editor. You must use the Test button to compile and preview the actual widget.
"Custom Pub Dependencies" not showing
You're on FlutterFlow's free plan. Custom pub.dev dependencies require a paid plan (Standard or above). Upgrade your FlutterFlow account to access this feature.
Chatbot shows but doesn't respond
Check that:
- Your projectSecretKey is correct (copy it again from Widget Chat dashboard)
- Your project has training data added
- Your Widget Chat account is active
Customization options
Widget Chat adapts to your app's design:
| Parameter | What it does | Example |
|---|---|---|
botName |
Name shown in chat header | "Luna", "Support Bot", "Amy" |
welcomeMessage |
First message users see | "Hi! Ask me anything about our app" |
primaryColor |
Chat UI accent color (hex) | "#FF5722" for orange, "#4CAF50" for green |
For advanced customization, the BotConfiguration class also supports:
| Parameter | What it does |
|---|---|
fontFamily |
Chat font (default: Roboto) |
systemInstructions |
Custom behavior rules for the AI |
isPreviewMode |
Test mode without consuming messages |
Use cases for FlutterFlow + Widget Chat
E-commerce apps
Train your chatbot on your product catalog. Users ask "What's the return policy?" or "Do you have this in blue?"—the chatbot answers instantly instead of burying users in FAQ pages.
SaaS apps
Your app has features users don't discover. A chatbot trained on your documentation guides users through features they didn't know existed. Reduces churn, increases feature adoption.
Service booking apps
"What time slots are available?" "How much does a haircut cost?" "Do you accept walk-ins?" Your chatbot handles the repetitive pre-booking questions so your staff doesn't have to.
Educational apps
Students ask the same questions every semester. Train your chatbot on course materials and syllabus. It answers instantly, 24/7, in any language.
Why Widget Chat over building your own
| Factor | Build your own | Widget Chat |
|---|---|---|
| Setup time | Weeks to months | 5 minutes |
| AI training | Build your own RAG pipeline | Paste URLs or text |
| Maintenance | You handle updates, scaling, costs | Managed for you |
| Cost | API fees + hosting + your time | Starts free |
| FlutterFlow compatible | Need deep Flutter knowledge | Copy-paste code above |
Building a chatbot from scratch in FlutterFlow would require custom actions, API calls to OpenAI/Claude, message state management, UI building, and ongoing maintenance. Widget Chat wraps all of that into one widget.
What's next
Once your chatbot is live:
- Monitor conversations in the Widget Chat dashboard to see what users ask most
- Improve training data based on questions the bot can't answer
- Customize the look to match your app perfectly
- Add system instructions to control the bot's personality and boundaries
Your FlutterFlow app now has something 99% of no-code apps don't: an AI assistant that actually knows your product.
Ready to add an AI chatbot to your FlutterFlow app? Get started with Widget Chat — free to try, takes 5 minutes to set up.
Comments
Comments are coming soon. We'd love to hear your thoughts!